Book Page Art DIY Home Decor Idea


Book Page Art
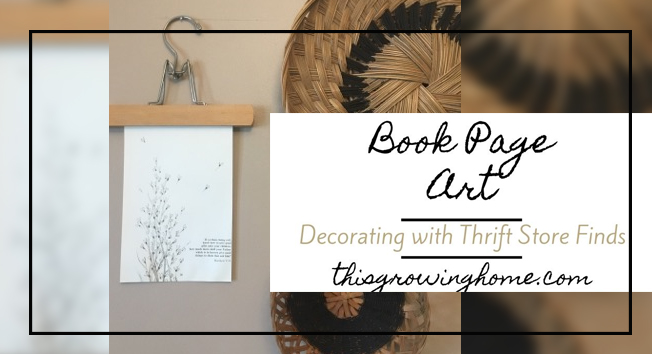
Book Page Art as DIY home décor? Yes!

When you’re headed out for some Goodwill shopping therapy or are trying to come up with easy DIY home décor ideas from the thrift store, I bet your thoughts don’t immediately jump to books. In fact, a lot of shoppers walk right past the book department or don’t realize Goodwill has one. Well, I’m here to say you’re missing out on a gold mine of serious home decorating potential! Book art is a trendy way to decorate your home in a variety of ways.

Buying decorative prints or wall art for your home can get very expensive very fast. So, when I’m looking for something to fill a space on my wall that is easy, beautiful and unique, one place I always check is Goodwill’s book department. While that may sound a little strange, I guarantee it’s worth a look! An easy home decorating option is to pull some pages from books and display them in frames or unique hangers.

Clipboard Frame

Book Page Art clipboard frame

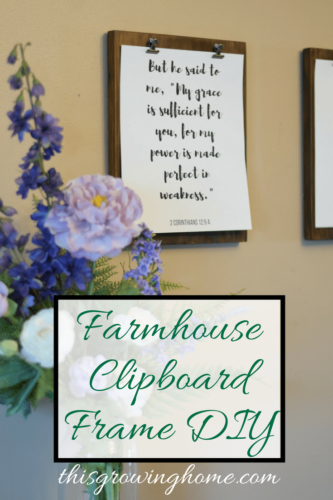
Here’s an easy DIY project for a unique hanging option: DIY Clipboard Frame https://www.thisgrowinghome.com/farmhouse-clipboard-frame-diy/

Framed Page Art

Book Page Art framed book pages
from www.lovegrowswild.com

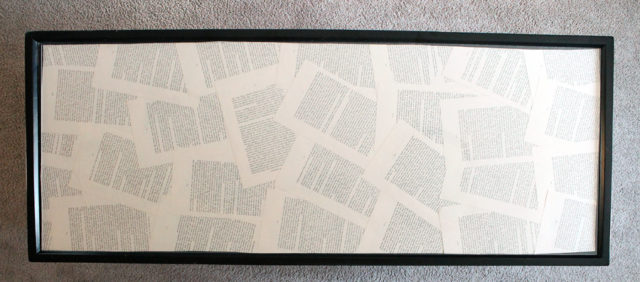
Book pages on their own are beautiful and have a ton of decorating potential. There is just something about the printed text that makes my heart skip a beat. And you can get creative by drawing, painting, or printing images onto those pages. Old Hymn pages are also great for this!
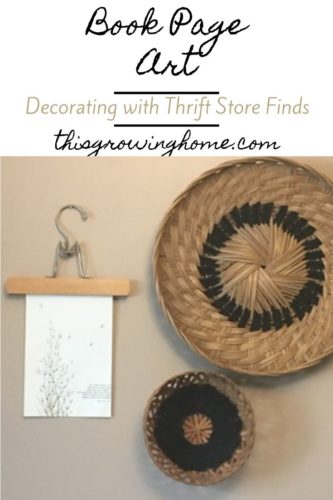
Map Art on Hanger

Book Page Art map on hanger

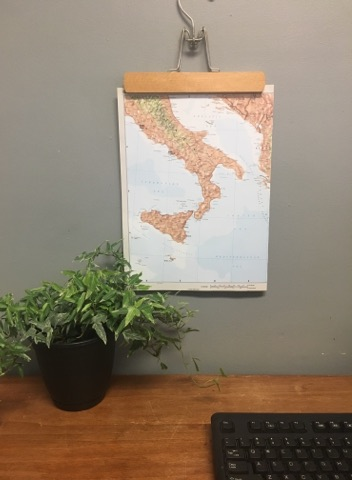
But if that’s not your style, there are still great options. When it comes to home décor, floral prints or maps are very popular. Grab an old Atlas or field guide and pull out your favorites! You can also see if they have a copy of your favorite book or author. I’ve even used a book of poems before. Or try hanging some vintage recipe book pages in your kitchen. Like I said, there are a ton of options!

Mod Podge Book Page Table

Book Page Art Mod Podge table

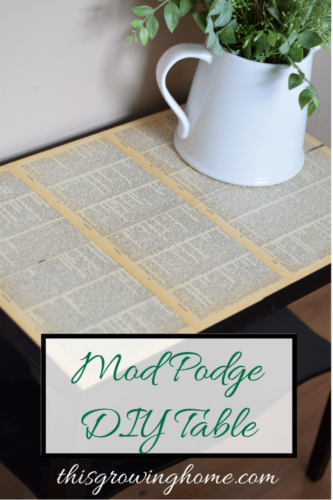
Here’s another great DIY with book pages: Mod Podge DIY Table https://www.thisgrowinghome.com/mod-podge-diy-table/


So, stop in at your local Goodwill store and get started on an amazing mixed media gallery wall! Everything in the post pictures came from a local Goodwill store, including the wooden pant hanger.

I will definitely be keeping an eye out for more of those.

For more home décor or DIY posts, check out my website at ThisGrowingHome.com


Repurposed Picture Frame Wreath

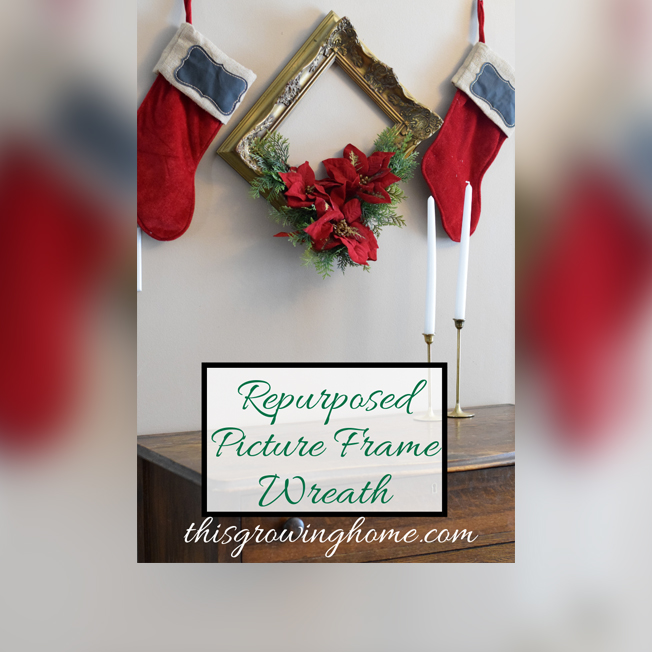
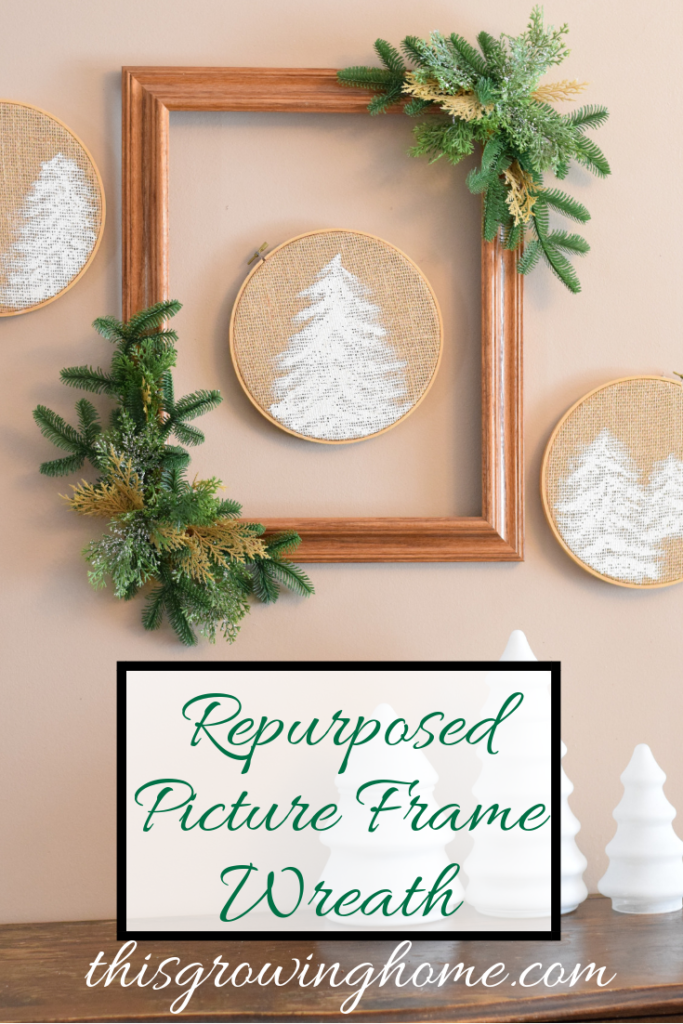
Are you ready for Christmas? This repurposed picture frame wreath is the perfect final decoration for your home, and is an easy DIY Christmas décor project using things found at Goodwill.

What you’ll need:

  1. Frames
  2. Greenery
  3. Hot Glue Gun / Glue Sticks

Supply Run!

You’ll want to start out this repurposed picture frame wreath project by going on a supply run to your local Goodwill Store. They will have a ton of picture frame options for you to choose from!

Once you’ve picked out your frame or frames for this easy DIY Christmas décor project, head over to the Christmas aisle at Goodwill for some greenery. This is where you’ll need a little vision. Any donated Christmas arrangements will work as long as they can be disassembled.

Here’s What I Used

For my wreaths, I found a rustic wood frame, an elaborate gold frame, and a lighter wood frame. I also used an evergreen centerpiece, a potted poinsettia arrangement, and some red poinsettias I found on a previous trip. With those I was able to create three repurposed picture frame wreath decorations!

I preferred mine to be more minimal, and so was able to stretch the greenery farther. If you prefer a fuller look, you can easily add more to your own DIY Christmas décor project.

Pull It All Apart

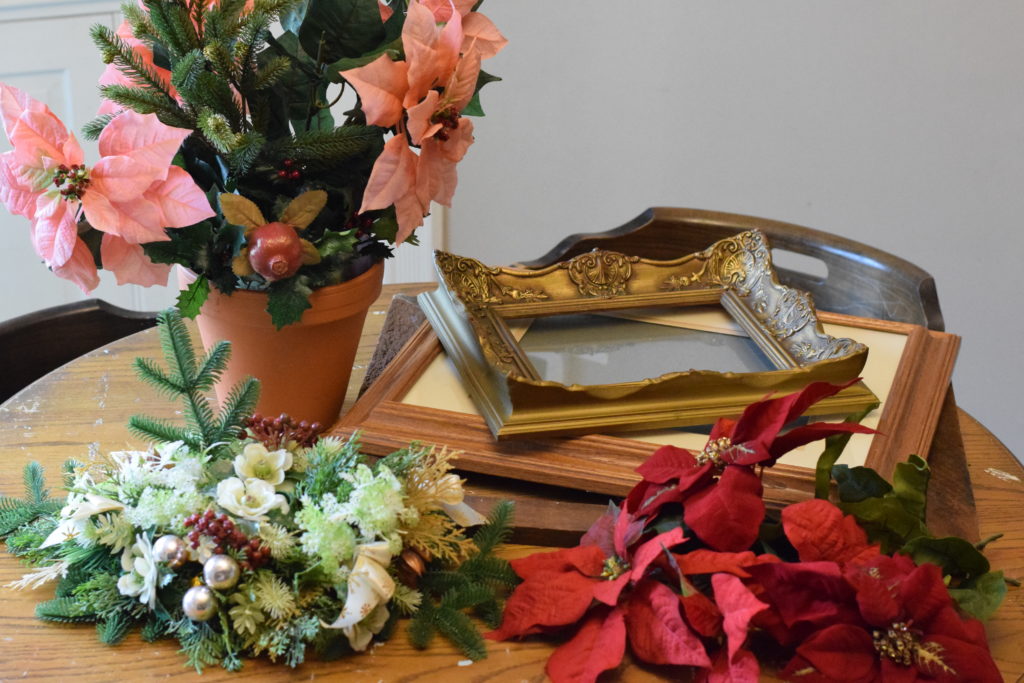
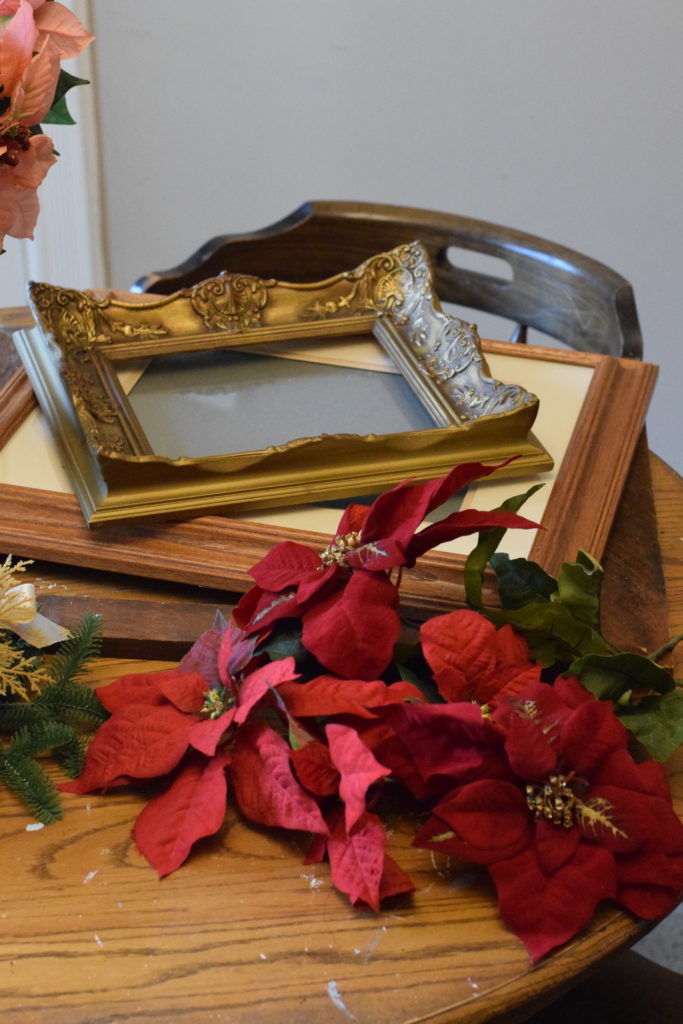
The next thing you’ll want to do for your repurposed picture frame wreath, is disassemble your supplies. Remove any pictures and glass from your frames, and separate the greenery you found.

I pulled mine apart and piled all the similar kinds together to see what I had of each. Then I organized which piles I wanted to go with each frame. Feel free to mix and match or stick to only one. Design it however you’re inspired! The beauty of this easy DIY Christmas décor project is that you can personalize it for your own preferences.

Lay It All Out

Once you’ve decided what greenery goes with each frame, you’ll want to lay it all out to make sure you have enough and perfect how it will be arranged on the frame. Find a center point that you will be working out from. For mine, I used the corner of the frame as the center point and laid it out so the greenery met at that point.

When that’s done, you can pull out the hot glue gun and get it warmed up.

Finishing Touches

When the glue gun is all warmed up, you can start applying the greenery to your repurposed picture frame wreath. Start with the farthest greenery from the center point and work toward the center. That way, you will hide any stems or glue under the next piece. Once you get to the center, you can nest the stems and glue under pieces that are already glued down so they aren’t visible.

If you are nervous about being able to disguise the glue points, you can add your own embellishment to the center point like a ribbon or bulb. You may even have one laying around after disassembling your greenery!

Get Hanging!

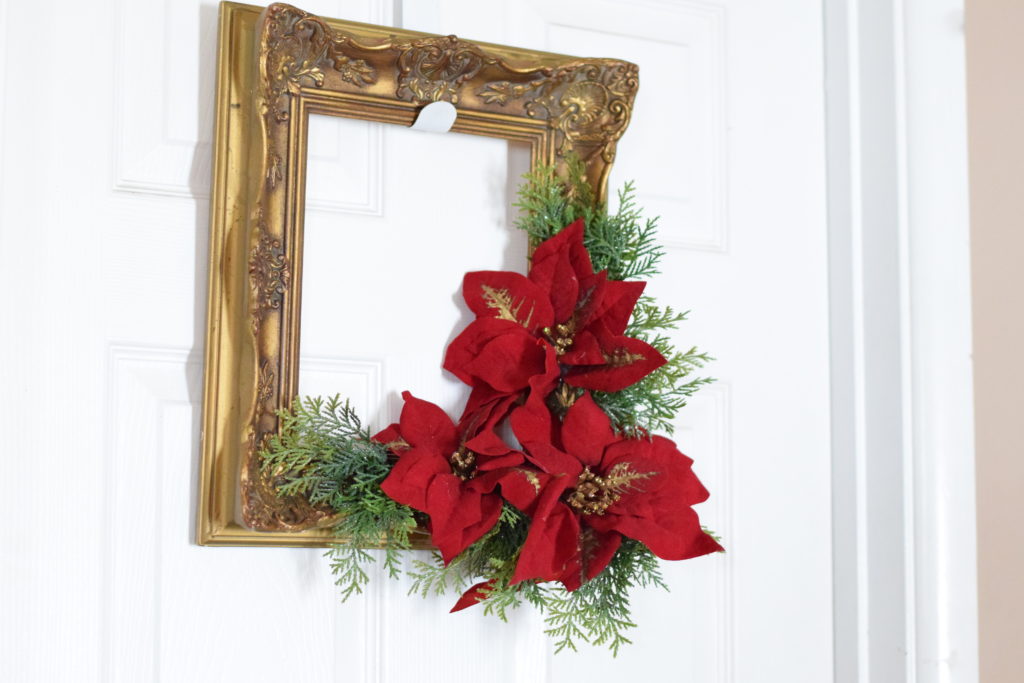
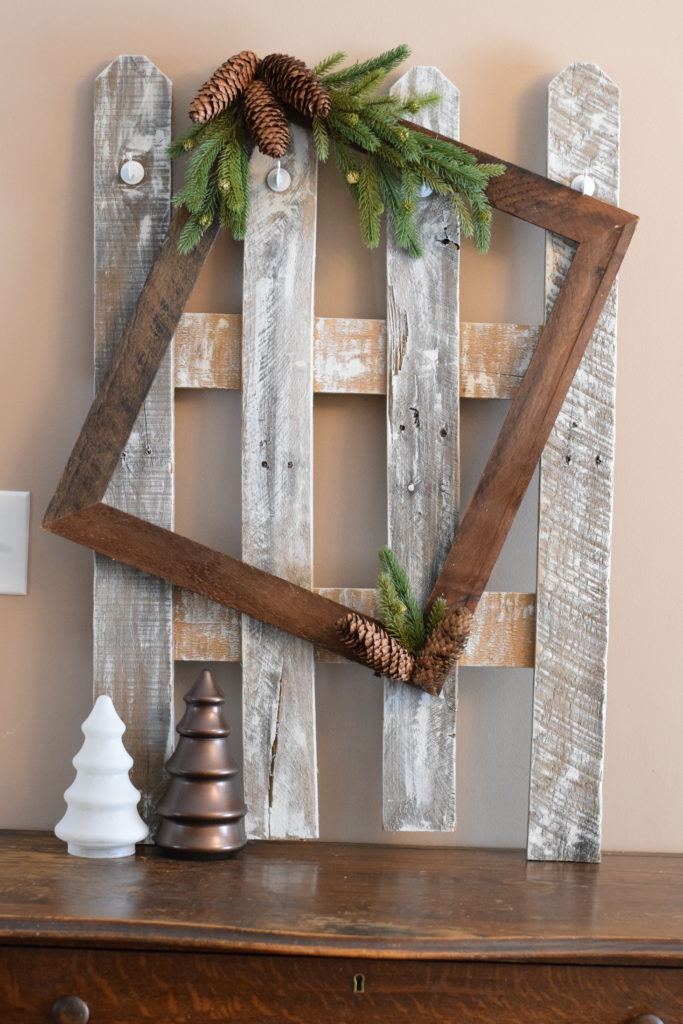
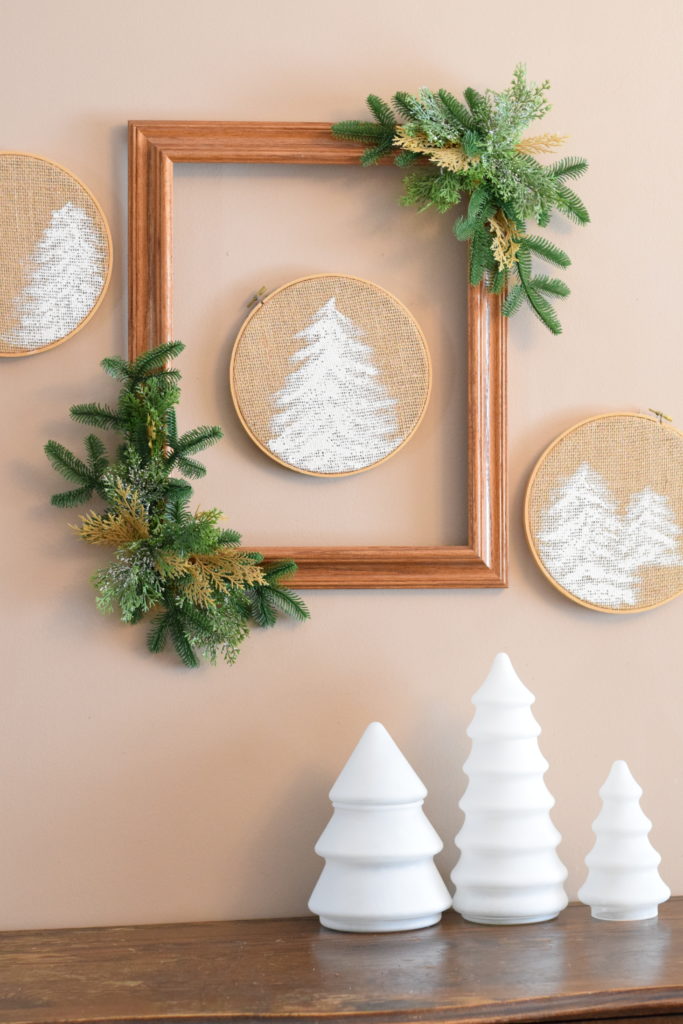
After the glue dries, your easy DIY Christmas décor is ready to be displayed! You can hang your repurposed picture frame wreath, or display it from a shelf.

I was so happy with how mine turned out! They look great on their own or as the focal point of your holiday wall arrangements! Enjoy your DIY Christmas décor pieces! You can find tutorials for the DIY Winter Décor Glass Trees and picket fence DIY Stocking Hanger on my website www.ThisGrowingHome.com

Or go directly to the posts:

https://www.thisgrowinghome.com/diy-winter-decor-glass-trees/

https://www.thisgrowinghome.com/diy-stocking-hanger/

Hopefully you enjoyed this fun and easy DIY Christmas décor project and are already getting started on your own repurposed picture frame wreath! Check in later for more fun and easy projects supplied by your local Goodwill! And… Happy Decorating!!

Farmhouse Fall Decor Bundt Pumpkin DIY

I don’t know about you guys, but I’ve been LOVING this Fall weather! And no Autumn season is complete without the smell of fresh baked goods, cozy knit sweaters, and PUMPKINS! I love incorporating pumpkins in my Farmhouse Fall Decor, and this fun DIY Bundt Pumpkin was a great addition!

Making Your Own Bundt Pumpkin

If you’re like me and love finding home decor at a great price or getting crafty and making your own, there’s no better place to look than at your local Goodwill! They have everything you could ever need for home decor or DIY projects.

I stopped at my local store and picked up some supplies for my Bundt Pumpkin. If you love this DIY and want to make your own, you’ll want to stop at Goodwill and pick up…

  1. Bundt pan
  2. Wooden Candle Stick
  3. Greenery (for the leaves)

You’ll also need

  1. Spray paint
  2. Hemp String

Step One: Prep the Pieces

You’ll want to clean your bundt pan and candlestick. Mine weren’t too hard to clean, but the wax on the candlestick can be a little tricky, so double check you’ve gotten all of it.

If the spray paint you got for this project requires it or if you’re concerned about it not sticking well to your pan, you can use sand paper and rough up the surface of your pan a little. Just be sure that you clean the dust off before painting it.

Step Two: Spray Away

I couldn’t resist doing more than one Bundt Pumpkin. So, I picked a couple different paint options. One pumpkin I painted metallic orange for a more traditional Fall Home Decor feel with a modern twist. The second, I painted white for a Farmhouse Fall Decor feel. If you’re wanting an even stronger rustic feel, you could even sand distress marks after the paint has dried.

Step Three: Finishing Touches

Once the paint dries, it’s time to make it look like a pumpkin! I strung some leaves onto the hemp cord and wrapped it around the top of the candlestick. I left the cord long to look like vines from the pumpkin stem.

The candlestick I got, had a screw in the bottom and came apart perfectly to slip onto the pan. Definitely pick up a candle like this if possible because it creates a great base for your Bundt Pumpkin once you screw the bottom back on over the pan. Otherwise try to find a candle that will fit down into the pan neck. Install your candlestick however appropriate.

I kept my candlestick a natural wood color because I wanted it to resemble a real pumpkin for my Farmhouse Fall Decor, but feel free to make yours unique by painting your “stem” if you want!

Hopefully you enjoyed this easy DIY Bundt Pumpkin tutorial, and are headed to Goodwill to get started on your own! I know it’ll be the perfect addition to your Fall Home Decor.

Find Amanda at:

Last Minute Thanksgiving Tablescape Ideas

This year I get to host both sides of my family at my home for the Thanksgiving holiday so I have been in full planning mode over the last couple of weeks. As a hostess, I know that often our time is more focused on the food than the decorations, but you need not spend oodles of your time crafting or purchasing a lot to make your table beautiful. In fact, this post shows you that that by shopping your very own home and adding a few inexpensive items from Goodwill, you are just minutes away from the perfect Thanksgiving table. 
Here are six great last minute Thanksgiving ideas to pull together a beautiful time for your holiday feast.

Add Thoughtful Layering

I am seeing so many beautiful layers this year for Thanksgiving decor. Holly Mathis Interiors shows you a beautiful table that you can achieve easily by layering items from around your house or from Goodwill.

A couple of items to note in this shot, you can add backyard leaf branches in glass jars from Goodwill to add a rustic element, flannel throws add warmth to the table without a more formal tablecloth, pumpkins add another natural element, and you can mix and match your chairs or mix in chairs found from the store to create that homey detail that I love. How pretty is that?

Add Unexpected Textures

Once again, I am seeing that people are pulling away from the traditional tablecloth and going for the unexpected texture on table. In Home Stories A to Z, she has used a beautiful cabled throw to add warmth and texture to the table. White linens can be stamped with gold (I love my friend Michael’s easy gold foil napkins tutorial for this!)

Check Goodwill for pretty knit blanket throws or white linens for stamping. You never know what treasures you can find in housewares until you go browse!

Additional details like pretty ribbon, personalized tags, and a few well-placed feathers never hurt either, do they?

Make Your Guests Feel Cozy

If I was going to design my perfect Thanksgiving table, it would look just like this. Gatherings of friends in the crisp fall air with cozy blankets are such a beautiful and lovely way to celebrate the season. 
Once again, we see how cozy the mismatched look can be. From mismatched pillows to blankets to chairs, it all comes together beautifully when placed around a table. A glass vase can hold a rustic bouquet from the backyard and pumpkins offer a beautiful detail leading up to the barn. 
This is definitely my dream tablescape and can be achieved just by bringing a few of the items you have from inside your house to the great outdoors. (image source: Lexington Company)

Personalize It

When something has my name on it, it immediately feels special to me. I love this idea for taking a simple Plexiglas circle and adding a little calligraphy to it to personalize each table setting for your guests. 
Is your handwriting as terrible as mine? I sure hope not! If it is though, Almost Makes Perfect provides the template you need to create your names and simply trace them, making this a beautiful and painless craft for the table. 

Add a 5-Minute Detail

Centerpieces can be pricey and feel tricky to pull together especially if you lack that designer instinct. I have found that the simpler the centerpiece though, the easier it is to see and chat with my dinner guests. 
My sweet friend, Julie Blanner, is the queen of beautiful and simple decor and she shares her easy 5-minute centerpiece for the holidays on her blog. With a quick trip to the grocery store and a stop at Goodwill for a platter, you can add a little natural beauty in no time flat! 
I also love these give thanks printables to tuck in your cutlery from Craftaholics Anonymous. That is another 5-minute detail I feel confident that I could execute! 

Put the Leftover Herbs to Work

My kitchen is filled with sage for our favorite stuffing and herbed turkey that I have loved to serve over the years. If you have any leftover, it can add a beautiful detail to your table. Simply place the herbs in a glass jar from Goodwill and tie with a simple satin ribbon to finish. Not only is this pretty to look at, but it also smells so good too! (image source: Buzzfeed)

Happy Thanksgiving to you and your family and I hope these easy last minute ideas inspire you for your holiday meal! 

DIY Lampshade Ideas

One of the quickest ways to update a room is to spruce up a lamp in your home and today I wanted to show you some easy and affordable ways to transform a lampshade from Goodwill. I love these ideas so much, in fact, that I have plans to add a new lamp or two to our space now for Spring! I hope you will be as inspired as I am by these bloggers and their incredible lampshade makeovers.

Add a Fun Print With Leggings

You can find a pair of leggings in just about any pattern or color combination right now at just about any store. Consider snagging a pair of inexpensive leggings and using this material to stretch over a lampshade in your house to add a trendy color or pattern to your home without a big financial commitment.
Head over to Vintage Revivals to get the scoop on how to update a lampshade with this inexpensive fabric

Add an Adorable Ping Pong Detail

I am a big fan of ping pong craft ideas and love this detail on a lampshade. You can use fabric paints to match a room in your home and then glue on this three dimensional detail for a fun look for any game room.

Get the scoop on this DIY Ping Pong Lampshade from I Love to Create here.

Go Industrial

Goodwill is the perfect place to hunt for lampshades that have beautiful bones underneath their fabric exterior. A simple removal of the fabric can create a beautiful industrial lampshade and the edition of an Edison bulb really completes the look on this easy DIY project. Check out this industrial lampshade makeover on Blythe Ponytail Parades.

Add a Fabric Detail

If you aren’t a fan of the industrial look, but have a great lampshade base to work with, consider adding your own unique touches with scraps of fabric. If you are a sewer, you may have a mystery bag of materials to work with to create this adorable scrappy fabric lampshade for a corner in your craft room like Pen’s Nook

Add a Feminine Touch

Nothing says Spring like floral and that is why I love this fabric flower lampshade. With simple fabric circles, glue, and a little shaping, this is the perfect craft to work on while binge-watching all of your favorite shows on television. Since you are covering the entire lampshade in flowers, it can really breathe life into a lampshade that may have seen better days thanks to a camouflaging of rosettes. 

Add a Unique Embroidered Touch

I love, love, love the look of embroidery and this DIY Constellation Lampshade from Transient Expression is jaw-droppingly awesome. I have been seeing constellation projects popping up on table runners and wall murals, but have fallen in love with this lampshade for my small home. If you can’t find a navy lampshade for your project, consider covering it in navy leggings (as I showed you in our first project listed here) or hunt through the t-shirt section of Goodwill for the perfect navy shirt to use!

What are some ways you have transformed a lampshade? Feel free to leave a comment below! We love hearing your ideas! 

7 DIY Table Runner Ideas

With the new year upon us, I look forward to sprucing up my home more than ever. A couple of years ago I decided to paint my kitchen table with a fresh coat of white paint to give it a new life. Now that the tabletop is freshly painted (and not freshly scratched and dinged), I have been eyeing easy diy table runner ideas to add an element of interest and texture to my tabletop. Not only is this a fun way to add another layer of design to your table, it can also be a great way to camouflage a scratched surface if painting a table just isn’t in the cards this year.

Here are 7 of my favorite table runner ideas for adding a touch of beauty to your kitchen or dining table.

Add a Tasseled Fabric Runner

If you know me, you know I love anything that involves a yarn or tassel. You can find loads of fabric to work with at Goodwill from tablecloths to sheets that don’t cost a lot. Repurpose this fabric into a simple table runner and add a beautiful yarn tassel detail to each end to add that handmade touch that I love to embrace in my home. You can get the scoop on this simple tasseled runner on Makers Society

Add a Touch of Ombre

I am mad for ombre projects and all of my favorite fancy shops carry beautiful dip-dyed napkins and runners for your table. Have you tried fabric dying before? I did my first fabric dying project when I restored an old pair of jeans and was shocked just how easy it is. With this technique you need some fabric dye, water, and a spray bottle. Hunt for a basic white sheet, tablecloth, or napkins you can use to add a touch of ombre to your decor. This easy dip-dying tutorial from Handmade Mood is a great one to help you figure out some great strategies for achieving these beautiful hues. 

Add a Bit of Whimsy 

I love home projects that are whimsical particularly if the whimsy matches the homeowner. Lovely Indeed offers this cute tutorial for creating a polka dotted table runner in my favorite metallic shade. The great thing about this tutorial is that you can make this table runner really speak to you and your own personality choosing a shape or silhouette that really matches your style. In my home, I would be cutting out owls or foxes as a nod to my love for woodland creatures. You could also go geometric and modern with triangles or arrows. Adding touches like this to your home makes people say, “Oh, this house is just SO YOU!”

Add a No-Sew Frill

I love burlap projects especially when those projects do not involve sewing. Did you not know that I am a sewing school dropout? I really am!  That is why I love this fun table runner from Liz Marie created for burlap. The ruffled detail on the edge adds a feminine touch to your table while still remaining beautifully neutral. What a clever way to disguise a scratched surface without a lot of effort!

Add a Little Lace

I am such a fan of beautiful lace doilies and am so inspired by this beautiful table runner made from a variety of lace doilies. I love little ongoing collections that take just a little bit of time and money to create a project and this would be such a fun collection to put together to create a beautiful table runner for your home. Check out this beautiful lace doily table runner created by Bayside Bride that just requires a bit of hand stitching to pull it all together. Isn’t it beautiful?

Utilize a Drop Cloth for Styling

Drop cloth projects are perfect for a small budget and can be created into just about anything from table runners to beautiful curtains. Utilize this inexpensive fabric to create an adorable ruler table runner that adds that touch of whimsy I was talking about earlier, for a cute runner on a craft table, or as a fun addition to your back-to-school decor. Get the scoop on this fast & easy ruler table runner on Country Living

Add a Woven Detail

As I said before, I love burlap and I love playing with texture on a table. These two ideas are combined into one in this beautiful woven burlap runner on Fab You Bliss that you can create by weaving strips of burlap to create a woven detail to your table. Although this one requires sewing schools (boo for this poor sewing school dropout) it appears that you just need to piece this one together and then sew a simple straight line down the edge to bring it all together. How pretty is that?

I hope these ideas inspire you to dress up a table with Goodwill materials or breathe new life into a Goodwill table you cherish! What are some of your favorite ways to create a DIY table runner? Leave your ideas in the comments below!